
CastScreen-Receiver Troubleshooting
To troubleshoot CastScreen-Receiver via SSH you just need to use the following commands.
# Check if CastScreen Process is running
ps | grep cs_receiver_arm

# Kill CastScreen process
killall cs_receiver_arm

# Go to scripts folder
cd /jci/scripts

# Start Castscreen process (from scripts folder)
./cs_receiver_arm mfw_v4lsink &
What you need to do is connect via SSH, kill the CastScreen process, go to scripts folder, run the CastScreen process, switch to CastScreen app on your phone and hit start, then switch back to terminal and note the output with a screenshot or whatever.
When I was running this to get screenshots for this tutorial it actually failed on me the first time. I got it going on the second try after unplugging the phone for 5 seconds then reconnecting to phone and SSH. Then it was running smooth.
Troubleshoot CastScreen via SSH:
| - Check if the CastScreen process is running. Kill the process if it is running. | 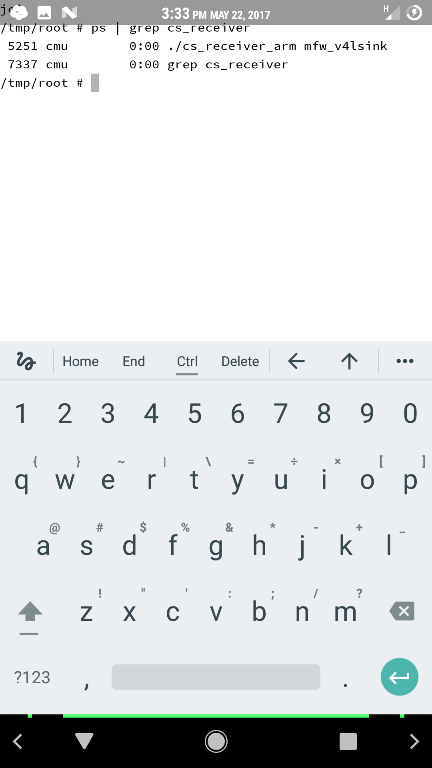 |
| - Run the process in your terminal the switch to the CastScreen app and press start. | 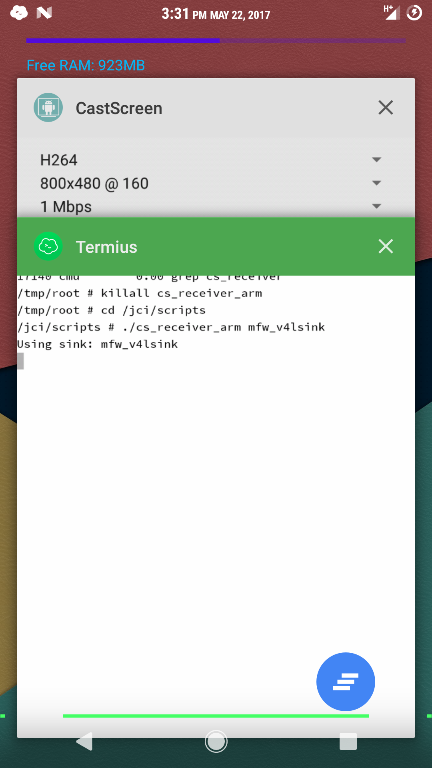 |
| - Switch back to your terminal and note the output. In this image the CastScreen hit an error and failed. | 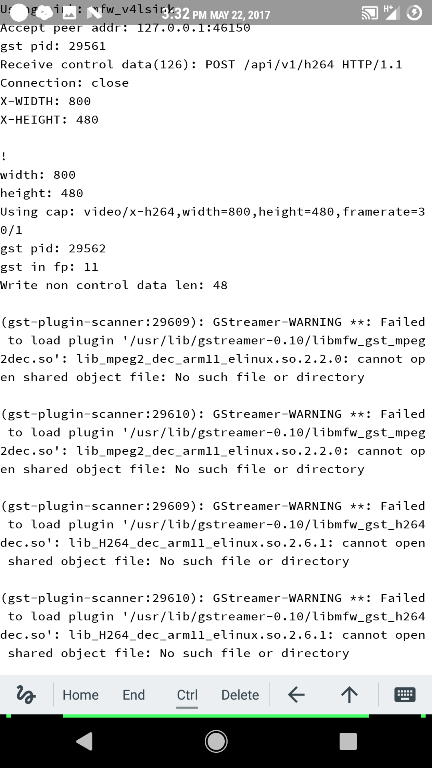 |
| - These are similar to the error messages thrown by the VideoPlayer. At this point I disconnect my phone for about 5-10 seconds, reconnect phone, and reconnect to SSH | 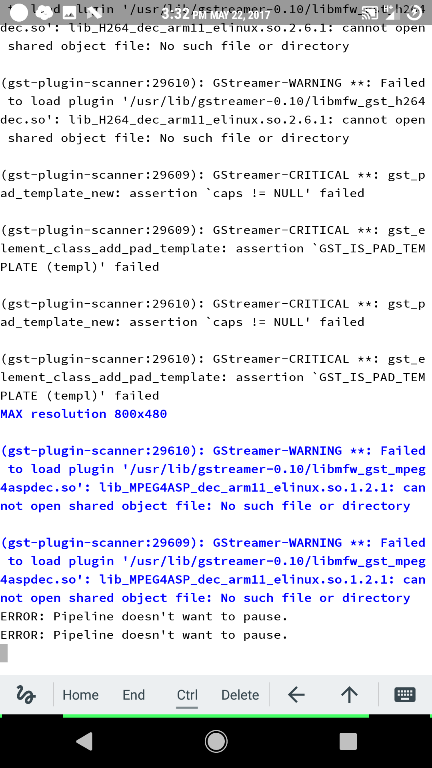 |
| - Run the commands to kill, and launch CastScreen process and start casting with CastScreen App | 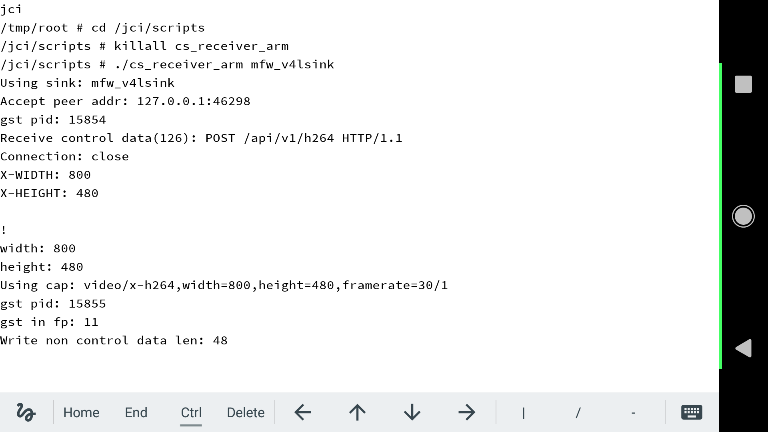 |
| - Hopefully by now it works for you, if not repeat disconnecting, reconnection, killing and relaunching the process. You can also try: Rebooting phone, rebooting Infotainment System, removing other USB devices, removing Navigation SD Card, and reinstalling the CastScreen-Receiver in the car. |  |
If you are having issues with connecting to adb debugging mode.
Troubleshoot adb:
adb kill-server
# disconnect your phone
adb start-server
# connect your phone try regular mode first then mtp then ptp if they don't work
adb devices -l
# you should get the authorization message and your phone serial number as the output, if it says unauthorized, run adb kill-server again
If you still can’t get it to connect then Revoke USB Debugging Authorizations in developer options on your phone and reboot your phone and the Infotainment system and try again.
Another Troubleshooting Method By Doog:
It turned out that for me, with two different phones (Android 5.1 and Android 7.1.1) doing the following steps (in order) did the trick:
1) Connect the phone via USB
2) SSH into the car’s CMU with your laptop/whatever.
3) Issue the following command at the prompt:
/jci/scripts/adb devices
It should show a device that says something like “unauthorized” next to it. If it doesn’t that means it’s not detecting your phone at all. If that’s the case make sure USB debugging is on. If you do see “unauthorized” you can move on
4) Disconnect the phone from USB
5) For safety’s sake (though I don’t think this is necessary) do the following in Developer Options on your phone:
- Turn off USB debugging
- Revoke USB debugging authorizations
- Turn off Verify apps over USB (other people report this is necessary, I’m not sure but it doesn’t seem to harm anything)
6) Back to the SSH session. Issue the following commands:
mount -o rw,remount /
/jci/scripts/adb kill-server
/jci/scripts/adb devices
The first command allows you to write to the drive, the forward slash at the end (/) is really important. Don’t forget that one. The last command shouldn’t show anything because you haven’t connected the USB device yet. This is just a check.
7) Plug in your phone to the USB cable again. You might get the USB debugging message at this point, though I think that happens when you launch Castscreen and start the program.
8) Launch Castscreen and use the following settings:
- H264
- 800x480@160
- 1 Mbps
- 127.0.0.1
- Click Input Receiver
- Now hit start.
Definitely by this point you should get the “Allow USB Debugging” message. Allow it, and you should be able to start casting.
After you cast once, you should probably reboot the system so that it goes back to read only mode.